Ube Slices
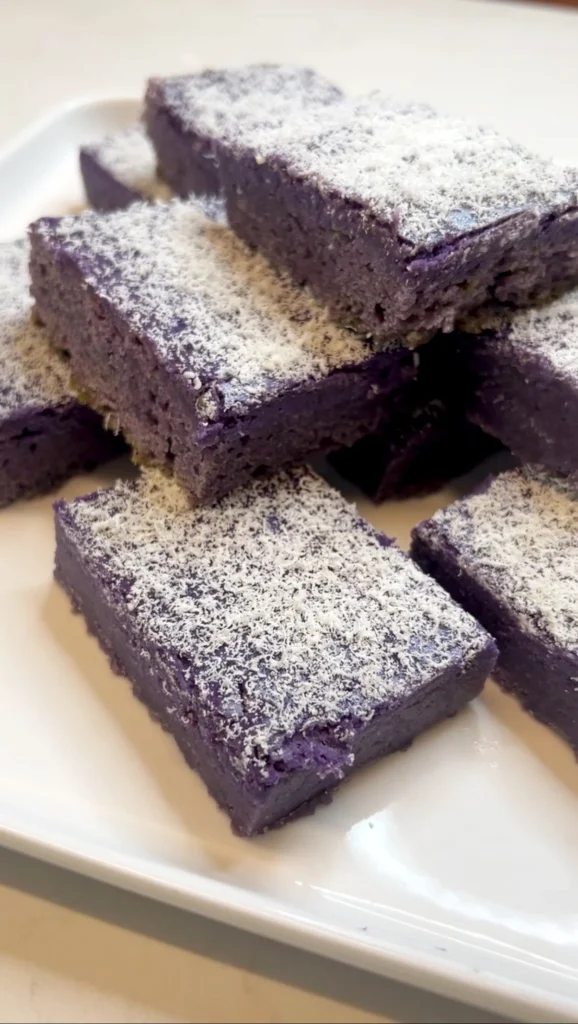
(The Brownie That’s Not Quite a Brownie)
If a brownie, a cheesecake, and a Filipino ube dessert had a love child… this would be it. These Ube Slices are fudgy but not dense, cakey but still gooey, with a silky cheesecake-style swirl baked right on top. The ube jam gives that nostalgic earthy-sweet flavour, the butter makes it melt-in-your-mouth rich, and the final snowfall of grated white chocolate? Pure magic.
It’s the kind of slice that makes people stop mid-bite and go, “What IS this?” And honestly… say no more. Get in my belly.
Ingredients:
Cheesecake Layer
- 250g cream cheese, room temperature
- 1/8 cup caster sugar
- 1 egg
- ½ tsp ube extract
Ube “Brownie” Base
- 250g salted butter, melted
- 1 cup white sugar
- ¼ cup brown sugar
- 1 ½ cups ube jam
- 2 tbsp ube extract
- 2 cups plain flour, sifted
- 1 tsp baking powder
Topping
- White chocolate, for grating (GT Pod from FinaMill or a Microplane works perfectly)
Method :
- Preheat your oven to 175°C and line a rectangular baking tray with parchment paper.
- Make the cheesecake layer:
In a medium bowl, beat the cream cheese and sugar with a hand mixer until smooth and creamy. Add the egg and ube extract, mixing until fully combined. Set aside. - Make the ube “brownie” base:
In a large bowl, whisk together the melted butter, white sugar, and brown sugar.
Add the ube jam and ube extract, whisking until fully incorporated.
Sift in the flour and baking powder, then fold gently until just combined. Do not over-mix — you want that soft, fudgy crumb. - Assemble:
Spread the ube brownie batter evenly into your lined tray.
Pour the cheesecake mixture over the top, letting it settle naturally or swirling lightly if you want a marbled look. - Bake:
Bake for 25–30 minutes. The centre should still be slightly soft — a few moist crumbs on a skewer is perfect.
Overbaking will make the slice cakier rather than fudgy, so keep an eye on it. - Cool and chill:
Allow the slice to cool completely, then chill in the fridge to firm up further. This step makes slicing clean and neat. - Finish and serve:
Once set, cut into squares or rectangles.
Grate a generous amount of white chocolate over the top — it adds sweetness, texture, and a gorgeous finish.
These freeze beautifully, so stash a few slices away for future cravings.